Setup and Install PosgreSQL using Docker
 photo by: Milad Fakurian
 PostgreSQL is a powerful, open-source relational database management system that is widely used by developers to build scalable and robust applications. In this tutorial, we’ll walk you through the process of setting up and installing PostgreSQL using Docker. But what is Docker? Simply docker is a software to make your application encapsulated within an isolated environment over your os and it’s called containerization so the postgreSQL would be flexible you can run it when you need it, next time i will create a blog detail about it. By the end of this guide, you’ll have a PostgreSQL database up and running on your local machine.
Prerequisites
- Docker installed on your local machine.
Step 1: Pull the PostgreSQL Docker Image
The first step is to pull the PostgreSQL Docker image from the Docker Hub repository. You can do this by running the following command in your terminal:
docker pull postgresThis command will download the latest PostgreSQL image from the Docker Hub repository to your local machine.
Step 2: Run a PostgreSQL Container
Next, you need to create a Docker container using the PostgreSQL image you just downloaded. You can do this by running the following command:
docker run --name your-posgres -e POSTGRES_PASSWORD=mysecretpassword -d postgresReplace your-posgres with the name you want to give to your PostgreSQL container and mysecretpassword with the password you want to set for the postgres user.
This command will create a new Docker container running PostgreSQL with the specified password.
Step 3: Access the PostgreSQL Container
To access the PostgreSQL container, you can use the psql command-line tool. You can do this by running the following command:
docker exec -it your-posgres psql -U postgresThis command will open a psql session in the PostgreSQL container, allowing you to interact with the PostgreSQL database directly.
Step 4: Persisting the Data
By default, the data in a Docker container is not persisted when the container is stopped or removed. To persist the data in your PostgreSQL container, you can use Docker volumes. You can do this by adding the -v flag to the docker run command:
docker run --name your-posgres -e POSTGRES_PASSWORD=mysecretpassword -v /path/to/data:/var/lib/postgresql/data -d postgresStep 5: Access Postgres Remotely
If you want to access your PostgreSQL database from a remote machine, you need to expose the PostgreSQL port to the host machine. You can do this by adding the -p flag to the docker run command:
docker run --name your-posgres -e POSTGRES_PASSWORD=mysecretpassword -p 5432:5432 -d postgresThis command will expose the PostgreSQL port 5432 on the host machine, allowing you to access the PostgreSQL database remotely.
if you get an error like this:
> docker run --name test-posgres -e POSTGRES_PASSWORD=test -d postgres
docker: Error response from daemon: Conflict. The container name "/test-posgres"
is already in use by container "5f91f047af66b25eac7785f69fa7797bffdfd08af03173f9fa89688d59b29e5f".
You have to remove (or rename) that container to be able to reuse that name.
See 'docker run --help'.
Our container name is already in use, so we need to remove it first:
docker stop test-posgres # if it's running
docker rm test-posgres
test posgres is the name of the container that we want to remove, you replace it with your container name. And you can repeat the command to run the container.
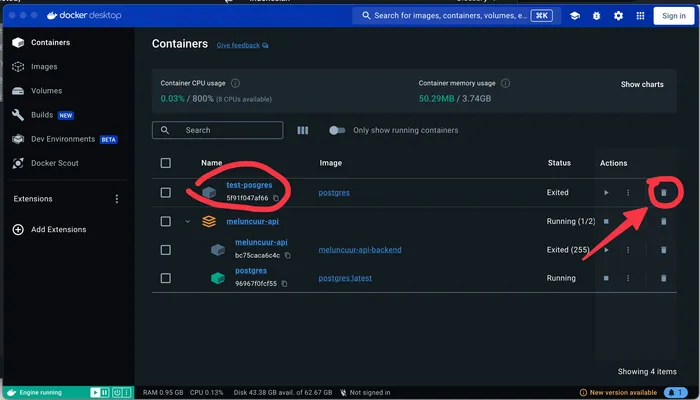
you can also delete from Docker Desktop by going to the container tab and delete it.
like this:
Conclusion
In this tutorial, we walked you through the process of setting up and installing PostgreSQL using Docker. By following these steps, you should now have a PostgreSQL database up and running on your local machine. If you have any questions or run into any issues, feel free to leave a comment below. Happy coding!